Archive

How to change PHP Version in Plesk ( Windows Hosting )?

Our newest servers give you the option to run different versions of PHP (7.2, 7.1 7.0, 5.6) on your account. This is important when using third-party applications that require the latest stable version of PHP. The PHP version can only be changed on shared servers and this functionality is available by default to all shared cPanel hosting customers who are on servers that use PHP 5.6.

Changing the PHP Version:

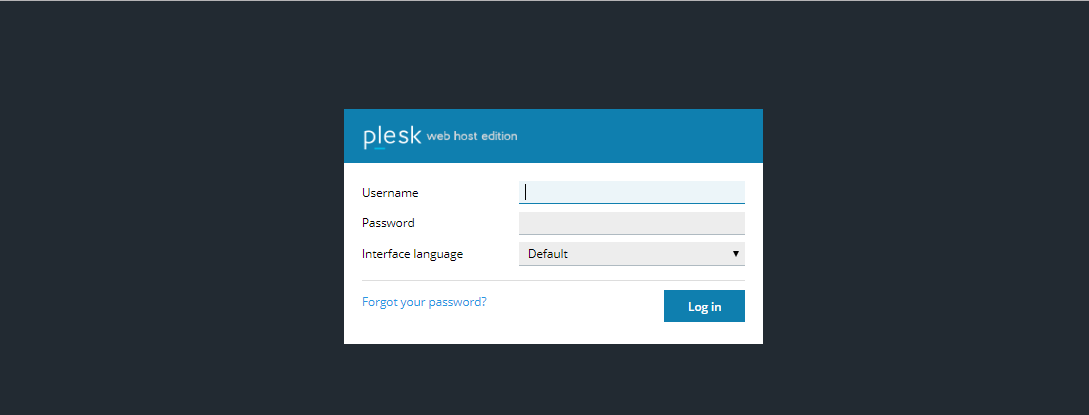
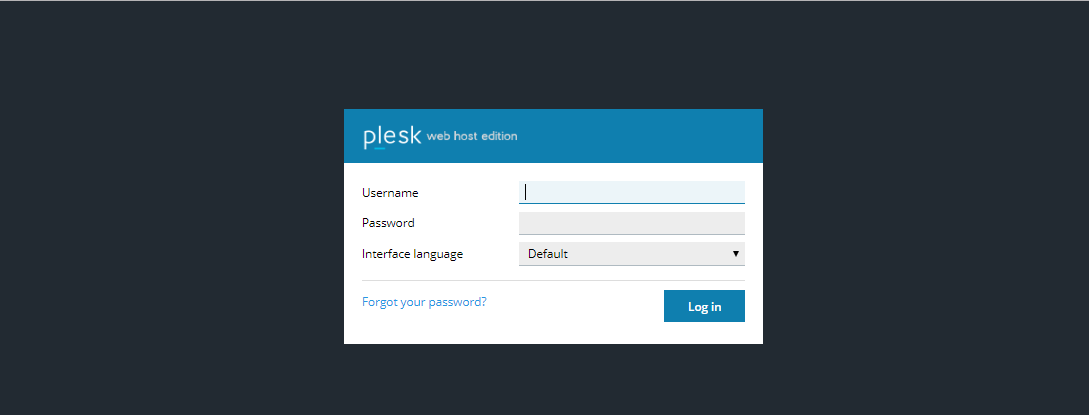
Step 1: Login to your Plesk panel.
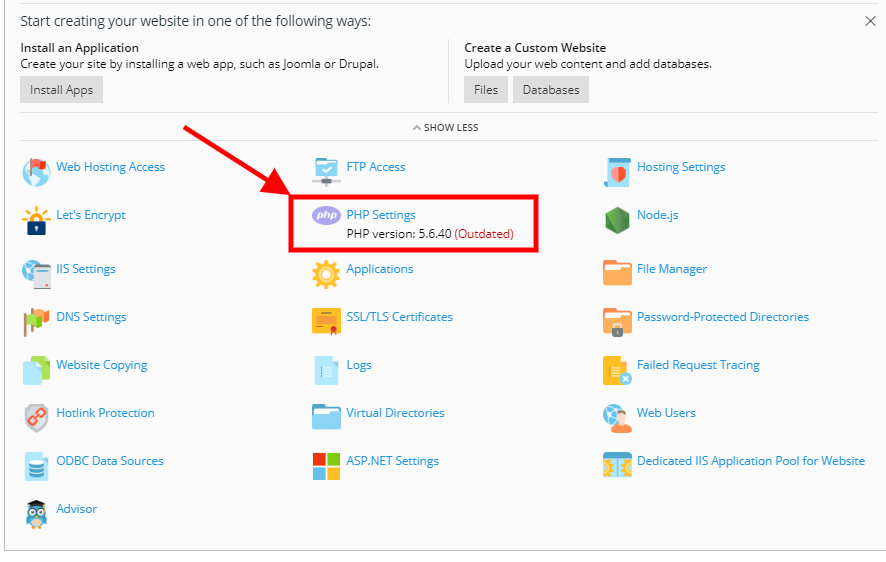
Step 2: Go to PHP Setting option as displayed in below image:
Step 3: From the drop-down select your PHP Version
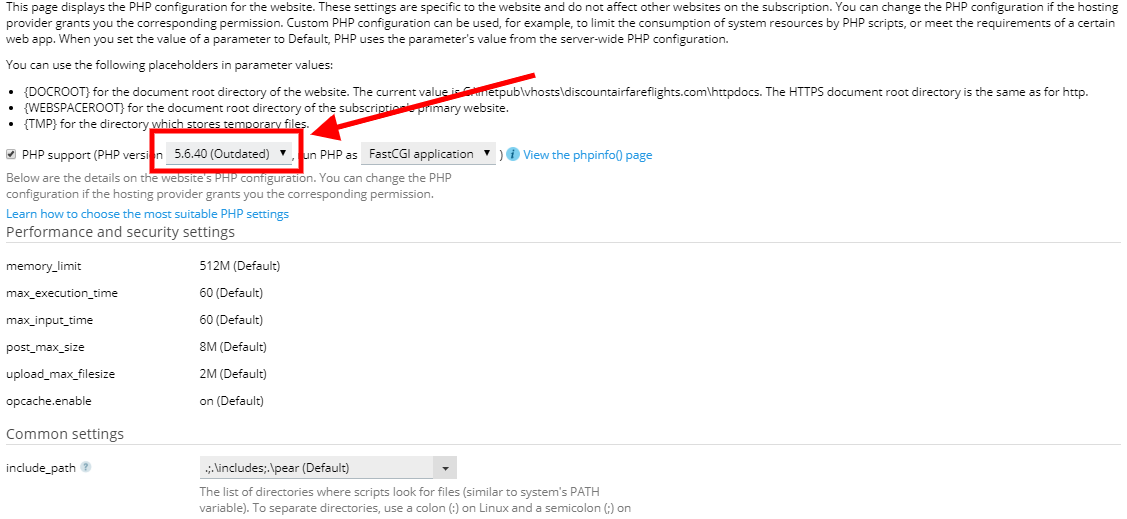
Step 4: Click OK/SAVE

Step 5: Congratulations, you adjusted your PHP version in Plesk.

How to change PHP Version in Plesk ( Linux Hosting )?

Our newest servers give you the option to run different versions of PHP (7.2, 7.1 7.0, 5.6) on your account. This is important when using third-party applications that require the latest stable version of PHP. The PHP version can only be changed on shared servers and this functionality is available by default to all shared cPanel hosting customers who are on servers that use PHP 5.6.

Changing the PHP Version:

Step 1: Login to your Plesk panel.

Step 2: Go to PHP Setting option as displayed in below image:

Step 3: From the drop-down select your PHP Version

Step 4: Click OK/SAVE

Step 5: Congratulations, you adjusted your PHP version in Plesk.

How to Change PHP version in cPanel?

Our newest servers give you the option to run different versions of PHP (7.2, 7.1 7.0, 5.6) on your account. This is important when using third-party applications that require the latest stable version of PHP. The PHP version can only be changed on shared servers and this functionality is available by default to all shared cPanel hosting customers who are on servers that use PHP 5.6.

Changing the PHP Version:

Step 1: Login to cPanel

Step 2: Go to Software Tab - Click on MutliPHP Manager

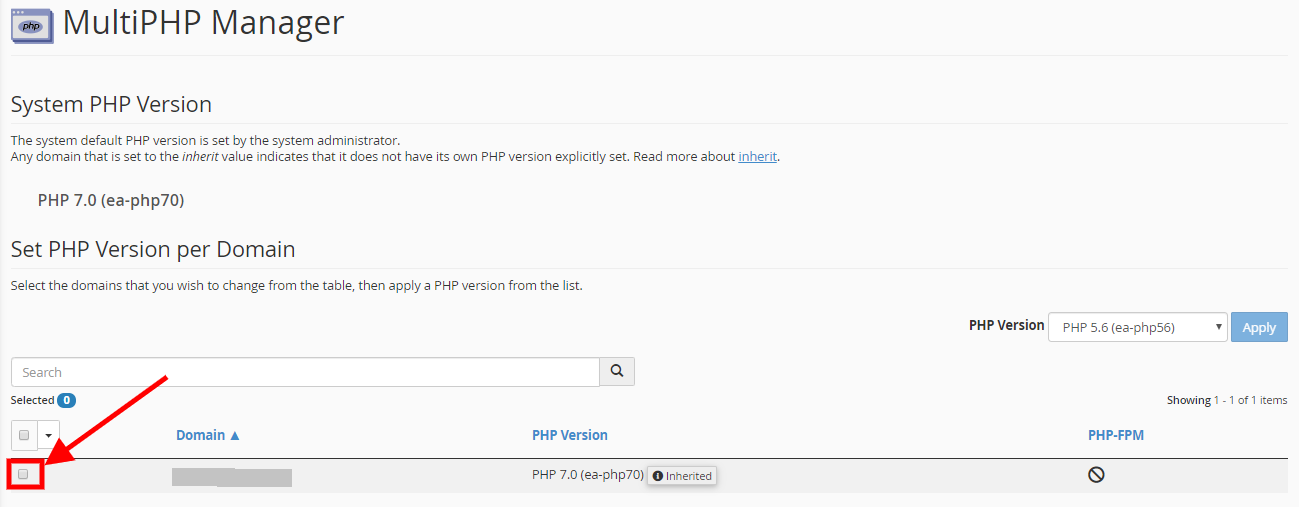
Step 3: Now tick on the checkbox of your domain as displayed in the Image below:

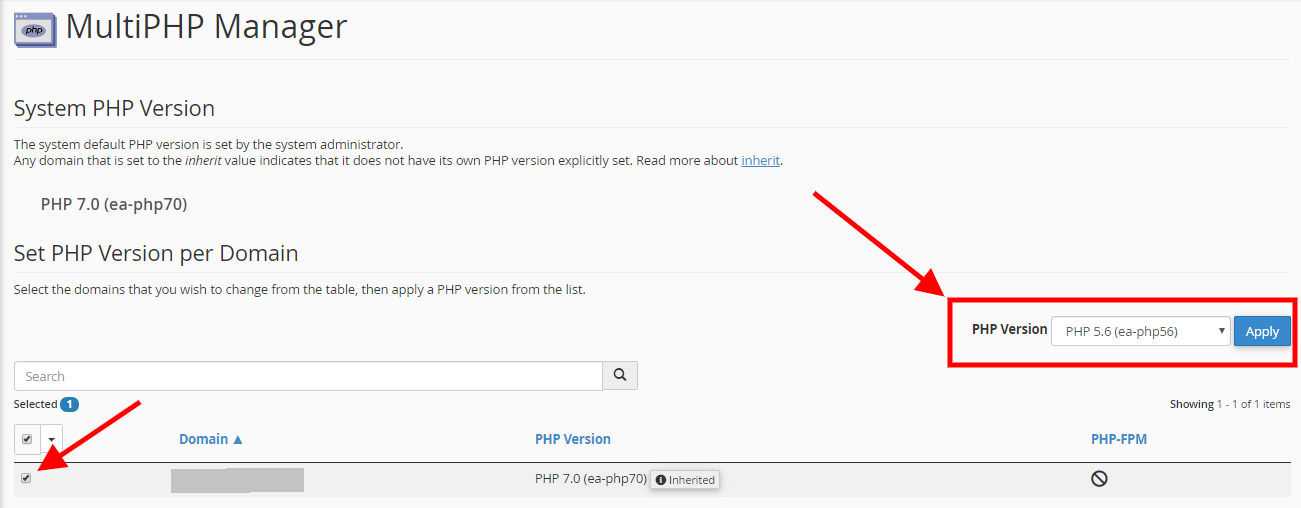
Step 4: On the right-hand side drop down “PHP version”. Select your PHP version and Click Apply.

Step 5: Congratulations, you adjusted your PHP version in cPanel.

How to Activate our FREE SSL in our Plesk Windows Hosting?

What is SSL?

SSL (Secure Sockets Layer) is a standard security protocol for establishing encrypted links between a web server and a browser in online communication.

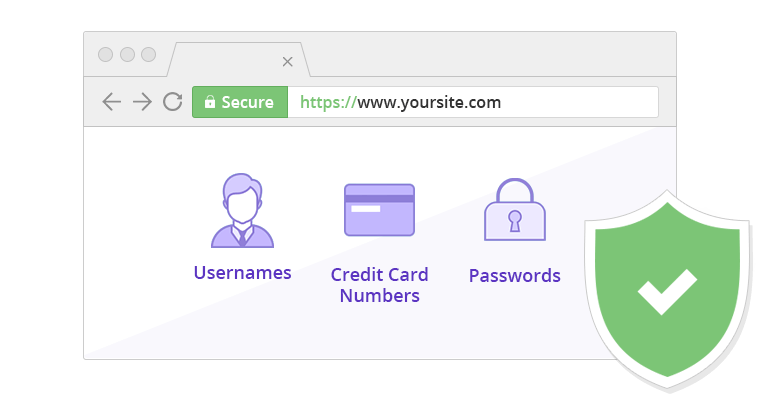
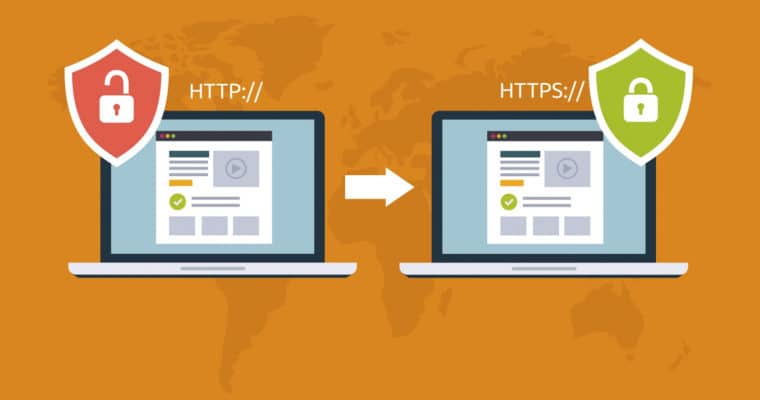
Secure Sockets Layer (SSL) is a security protocol that creates an encrypted link between a web server and a web browser. It ensures that all transferred data remains confidential.The green sign means the site is protected by SSL. It will protect you from data breaches, and it gives visitors a good reason to trust you with sensitive information. It improves your rankings in search results.

HOW TO ACTIVATE OUR FREE SSL IN OUR PLESK WINDOWS HOSTING?

Step 1: Log in to the Plesk Panel

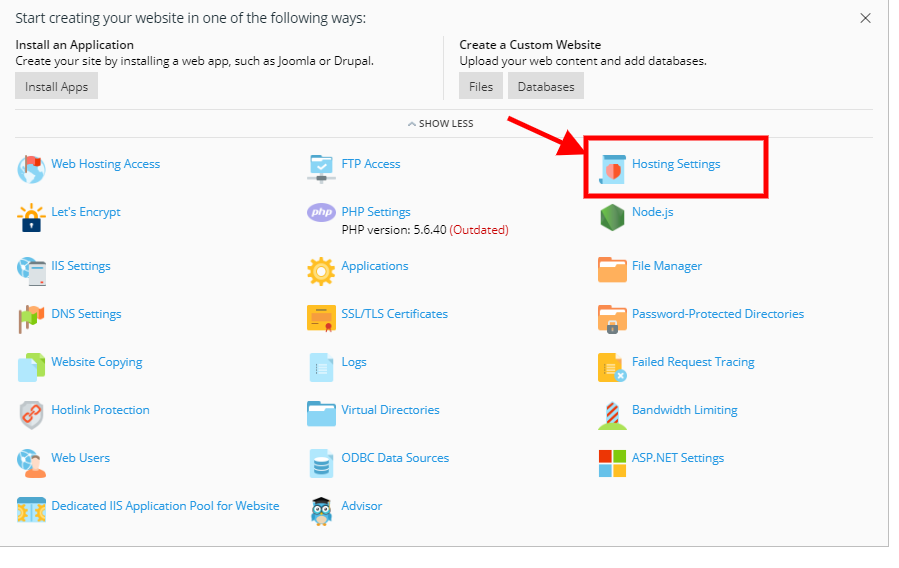
Step 2: Once you have a login to the panel you will see all the following features as displayed in the image. Click on the Hosting Settings

Step 3: Once Page is opened Tick on both checkboxes “SSL/TLS Support” & “Permanent SEO-safe 301 redirect HTTP to

Step 4: And Click on SAVE

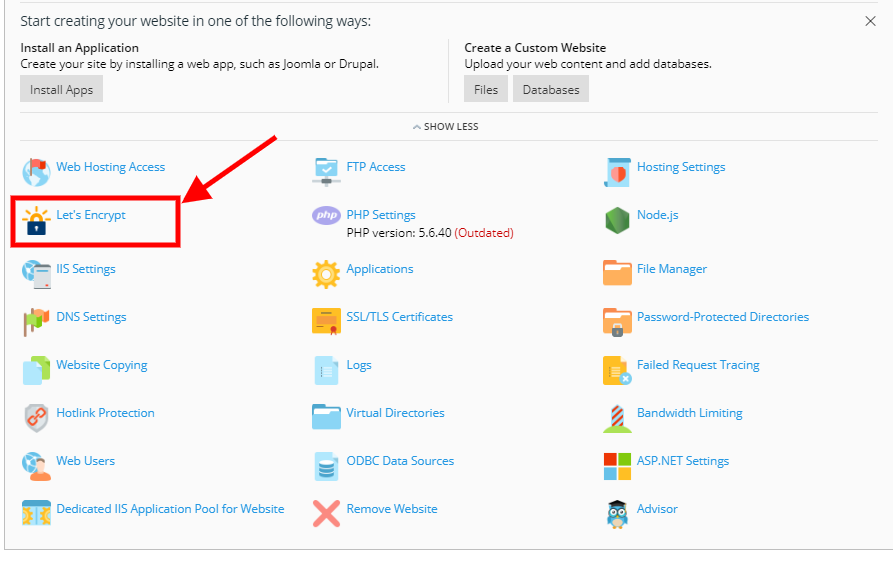
Step 5: Then Go to Menu “Let’s Encrypt”

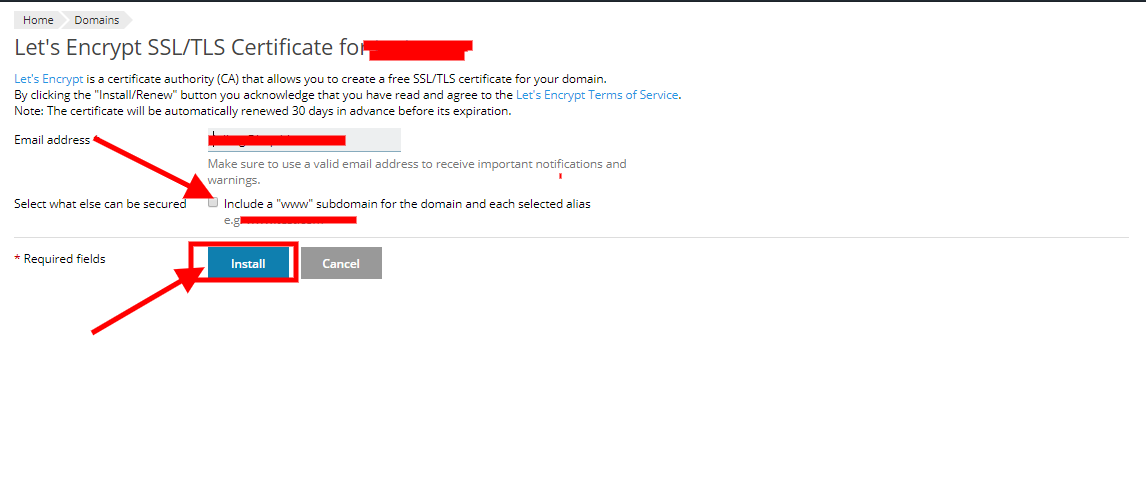
Step 6: Enter your Email ID, tick the checkbox “Include www”

Step 7: And Click on Install => Continue/Reload

Step 8: Congratulations your SSL is active. Please try opening your domain in a private window.

How to Activate our FREE SSL in our Plesk Linux Hosting?

What is SSL?

SSL (Secure Sockets Layer) is a standard security protocol for establishing encrypted links between a web server and a browser in online communication.

Secure Sockets Layer (SSL) is a security protocol that creates an encrypted link between a web server and a web browser. It ensures that all transferred data remains confidential.The green sign means the site is protected by SSL. It will protect you from data breaches, and it gives visitors a good reason to trust you with sensitive information. It improves your rankings in search results.

HOW TO ACTIVATE OUR FREE SSL IN OUR PLESK LINUX HOSTING?

Step 1: Log in to the Plesk Panel

Step 2: Once you have a login to the panel you will see all the following features as displayed in the image. Click on the Hosting Settings

Step 3: Once Page is opened Tick on both checkboxes “SSL/TLS Support” & “Permanent SEO-safe 301 redirect HTTP to

Step 4: And Click on SAVE

Step 5: Then Go to Menu “Let’s Encrypt”

Step 6: Enter your Email ID, tick the checkbox “Include www”

Step 7: And Click on Install => Continue/Reload

Step 8: Congratulations your SSL is active. Please try opening your domain in a private window.

How to add http to https redirection on website (Displaying Secure in URL) in cPanel Linux?

Once you have activated your SSL. Please follow these steps to display secure in your url (Adding http to https redirection). If you still have not activated your SSL you can activate it using our previous guide How to activate our free SSL certificate in cPanel? Let’s start following are the simple steps for the same:

Step 1: Log in to cPanel

Step 2: Locate and click on File Manager in File Section:

Step 3: Then enter in the public_html folder by double click on same. (If you adding SSL on subdomain or Addon domain enter in their respective folder)

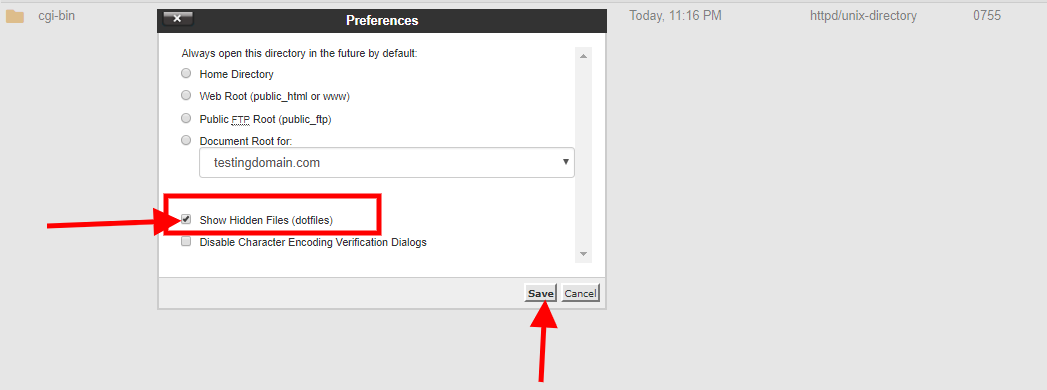
Step 4: Then Locate file .htaccess in same folder. The file is usually hidden in cPanel. You can make it visible by Locating setting option on top Left corner.

Step 5: Then a popup will appear. Tick on show hidden files and apply.

Step 6: If still the file missing. Then you can create it by:

Step 6: If still the file missing. Then you can create it by:

Step 7: Right Click on the same. And Edit and enter the following code (As it is):

RewriteEngine On
RewriteCond %{HTTPS} !on
RewriteRule (.*) https://%{HTTP_HOST}%{REQUEST_URI}

Step 8: Click SAVE and now open your website.